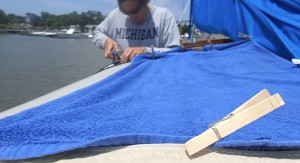
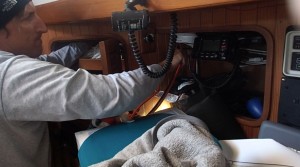
The Go Power! package is great in that it includes the panel itself, the charge controller, and almost everything you will need to hook it up, but we did find that a few things are lacking in the kit. If you are considering purchasing a package from Go Power! or are preparing to install one, you might want to pick up a few things in addition to what is included so that you can best complete the installation.
First, and maybe most importantly for boaters, you will want ring terminals for 8 gauge wire so that you can attach the ends of the leads from the charger securely to the battery. We did not have these, so, at the moment, we just have the wires wrapped and tightened around the battery terminals, which is clearly not the way to go. We will be rectifying that at the first available opportunity, when we get to Cape May.
Also important for boaters installing the panel on a bimini or anyone putting the panel on another non-rigid surface is some form of backing panel. We used quarter-inch corrugated plastic (like in a lawn sign), though you might find something else to better suit your needs. Regardless of what you choose, you should be sure to use something to extend the life of your panel; the promotional material and instructions we saw did not mention the need for backing the panel, but a call to the Go Power! technical support line confirmed that some form of backing was recommended.
Third, you might find that you need more wire than Go Power! includes in the kit. They recommend that the entire run from the panel to the controller and on to the battery be no more than 25’. However, we could find no good place to install the charger closer to the battery, so we ended up with a 27’ run. Consequently, we needed to pick up an extra twenty-four feet of wire (12’ x 2). While the instructions indicated that 10 gauge was the smallest wire one would want to use, Go Power! included eight gauge wire with the package. So, we purchased eight gauge wire to finish off the run and figured we would have less power loss because of it.
Fourth, the fuse that Go Power! provides with the kit is installed in the middle of a short ten gauge bit of wire. Since we have eight gauge wire everywhere else in the installation, we want, as we figure most people will as well, eight gauge wire for the fuse, which is installed in the run from the charger to the battery. We will have to procure this somewhere along the way as well, which should not be too difficult.
Next, Go Power! helpfully provides butt connectors for inserting the fuse in-line. However, the butt connectors are for 10 gauge wire, so we ended up smushing the eight gauge wire into the smaller butt connector. It is good enough for now, but we will be using eight gauge butt connectors when we replace the fuse.
Finally, the kit included heat shrink covers for the butt connectors. However, the covers are the same size as the butt connectors, so they do not do any good. I ended up using a cover to seal one side of the connection and liquid electrical tape to seal the other. Again, when we refit the fuse and affix the terminal connectors, we will ensure that we either have heat shrink butt connectors or get a long enough heat shrink cover for the entire connection.
If you have any problems installing the panel and controller, we highly recommend calling Go Power!’s technical support line. They were extremely helpful when we called.


Enjoy reading your entries. Really like how you incorporated videos into your blog. Are you using a specific WordPress style?
Thanks
Jim
Thanks, Jim. Glad you are enjoying the posts and videos. We have been using the WordPress Twenty Ten theme. Sometimes we think about changing up the look of the blog, but we have not taken the time to do so.